Showing posts with label diy. Show all posts

Thursday, August 13, 2015

Friendship bracelets for end of summer

It's the end of summer. 

Do you have a houseful of bored nocturnals milling around looking for something to do? 

Perhaps you also have some barefoot neighbor kids thrown in the mix, too?

Celebrate their summer alliance with friendship bracelets. All you need is some yarn. And maybe a few beads.


Tape three stands of yarn to the table and space the strands.

Then begin braiding.


Add a bead or two if you want to be fancy.

Then, just tie the two ends together to make a bracelet! 

If the strands are really long, you can drape it on the arm, then twist and double over. (you know, like when a necklace is too long). This makes a thicker bracelet. 

The end of summer is such a bittersweet season.

Have a lovely day!


This post shared on:
Artsy-Fartsy Mama

Wednesday, August 12, 2015

Fruit fly don't bother me

Fruit fly don't bother me.
For I belong to somebody.

Well, that's not exactly how the song goes, but it's what I've been singing lately.

I learned how to trap fruit flies a few years ago and this tip works every time.

FRUIT FLY TRAP

Just put a few tablespoons or maybe 1/4 cup of apple cider vinegar in the bottom of a cup.
Add a couple drops of dish washing liquid.
Then fill it to the top with water to make a deadly snow cone for the little buggers.

Sometimes the process needs repeated the next day. Put a cupful in every room where fruit flies are a problem.

Fruit fly don't bother me!

Have a lovely day!

Wednesday, August 21, 2013

Blue jean organizers

I had quite a collection of blue jeans with holey knees. It was time to re-purpose a few of them!

I grabbed a curtain rod and glued some red ribbon to it.

Then I cut the jeans at approximately the same lengths. 

The curtain rod was threaded through the belt loops of the jeans. 

Finally, I tied the curtain rod to shelf brackets.

The pockets come in handy for storing odds and ends.
Here is how the whole thing looks:
The parts of the jeans I cut off are still being stored. 

Isn't denim great? You never know when even the smallest bit of it will come in handy.

Have a lovely day!


Shared on these sites:
Handy Man, Crafty Woman
Life with the Crust Cut Off

Monday, June 17, 2013

Taboo repurposed


Years ago, this tool would have been inappropriate to display in mixed company; yet there I was, "winning" it at a white elephant, rob your neighbor gift exchange party.

Do you know what it is? Here is another view:

It's a toilet paper holder! 

As if that isn't enough to make all my dreams come true, this particular version boasts that elegant fishing reel style so popular in home fashion magazines these days.

You might think this is a gag gift but the joke's on them!

Because...

I turned it into a unique dispenser for my curling ribbon!! 

It's made for hanging on a wall, obviously, and I considered bolting it somewhere. But I have been enjoying the portability. 

It is like an extra set of hands. No more juggling a spool while wrapping a gift! I wish I had one for every color of ribbon.

Aren't you glad times have changed enough that ribbon dispensers are no longer considered unmentionable in polite conversation?

Thursday, June 13, 2013

Birthday wrap. It's elementary.


Went to a birthday party last weekend. This was the gift we took. 

Did you guess the wrapping was a deflated helium balloon?


It's so sad when party decorations lose their passion.


I tried tossing them in the air, but they always drifted down again. 

Fortunately, these balloons got a second chance at life.

Sherlock knew what I had in mind. 


I cut open one side of the balloon. It could be used as a gift bag at this point.


I kept snipping, though, to use it as traditional wrapping paper. I like the way the material gave me a natural angle. I was able to fashion an envelope-look on the back.

Comfy in there, Sherlock?

Monday, May 6, 2013

Jelly jar jamboree


Jubilation! It's a jelly jar jamboree.

The only thing I love more than red and white gingham? Jelly jars, of course.

You got me on a technicality. These aren't all jelly jars. Some used to contain pickles, hot peppers, marshmallow fluff--all kinds of things. 

Enjoy the parade!!


Thursday, May 2, 2013

Obligatory laundry soap recipe

I know. I know. 

You've seen this recipe all over the Internet. Please forgive me as I add it to my recipe collection here. 

As a bonus, I have done the math about cost savings of making laundry soap vs. buying detergent. 

Here is how I make homemade laundry soap. It only takes me five minutes to prepare a batch.

Homemade Laundry Soap

Ingredients:

Bar of Ivory Soap, unscented
Borax
Arm and Hammer Super Washing Soda
Essential oil (optional)

Directions:

You may wish to wear rubber gloves but I don't.

1. Get a plastic bucket with lid (like an empty ice cream tub).

2. Shred one bath bar of plain Ivory soap—not scented, with a cheese grater.
    (Beware of any soap or beauty bars with perfumes or oils. They may stain 
    your clothes!)

3. Combine the Ivory soap shreds with:
    2 cups of Borax
    2 cups of Arm and Hammer Super Washing Soda

Don’t inhale the cloud of powder while stirring. It’s not too much of a cloud, but still the same…keep your distance. 

Use 2 tablespoons of this soap per load. Some loads I use double (dog blankets) and some loads I add a couple drops of essential oil (um, dog blankets).

If you use cold water and hang your laundry to dry (way to go!), then you might notice white soap spots, just a few. These brush off with a toothbrush, hair brush or fingernail. No big deal, really. Shredding the bar soap finer may remedy this. If you use cold water and dry clothes in the dryer, you probably won’t notice any white spots.

This soap does not make suds and that’s OK. It also doesn't have a scent other than the Ivory soap scent, which is nice. For more of a laundry smell, tumble dry load with a dryer sheet or hang clothes outside for a fresh air scent.

The math:            
       
Borax (76 oz.—11.5 cups) costs $2.98 at WalMart.
Washing Soda (55 oz.—5.5 cups) costs $2.79 at Schnucks.
Ivory soap costs about 35 cents per bar.


There are 16 tablespoons in one cup.
One bar of Ivory soap shreds into about 4 cups.

To make 44 cups of laundry soap (704 tablespoons):
(1) Box of Borax, 11.5 cups - $2.98
(2) Boxes of Washing Soda, 11 cups - $5.58
(5.5) Bars of Ivory Soap, shreds into 22 cups - $1.93
Total -$10.49

$10.49 should do approximately 352 loads of laundry (704 tablespoons divided by 2…to reflect using 2 tablespoons per load). Compare this to brand name laundry detergent selling for $11 to do only 80 loads.

This method is only smidge more effort but a lot of cost savings!

*Disclaimers: I am not an expert. Your results may vary. Keep out of reach of children. This recipe was not tested on a high efficiency washer. This recipe was used in a home with a sewer system as opposed to a septic system. Prices may change and vary from store to store.

Tuesday, April 30, 2013

Old loaf pans three ways

Out of a stack of quite a few loaf pans, I only have two good ones. The rest have holes or are exceptionally rusted.

No problem. I just found other ways to use them.

Use #1: 

Forks and spoons holders.


The silverware drawer in the kitchen was ALWAYS busy with people grabbing forks and spoons. (Imagine that.) 

I would often turn from the stove quickly to grab a spoon, only to run smack into someone's back as they rummaged through the drawer. Aaack!!

My son gave me a silverware set for Christmas a couple years ago, so I was able to set up our serving station in the part of the kitchen where hungry people need to be--the dining part. 

Stay out of the cooking area, will ya?

Anyway, no big whoop, but here is our humble serving station:


I use the Dr. Seuss method for stacking dishes. :)

Use #2:

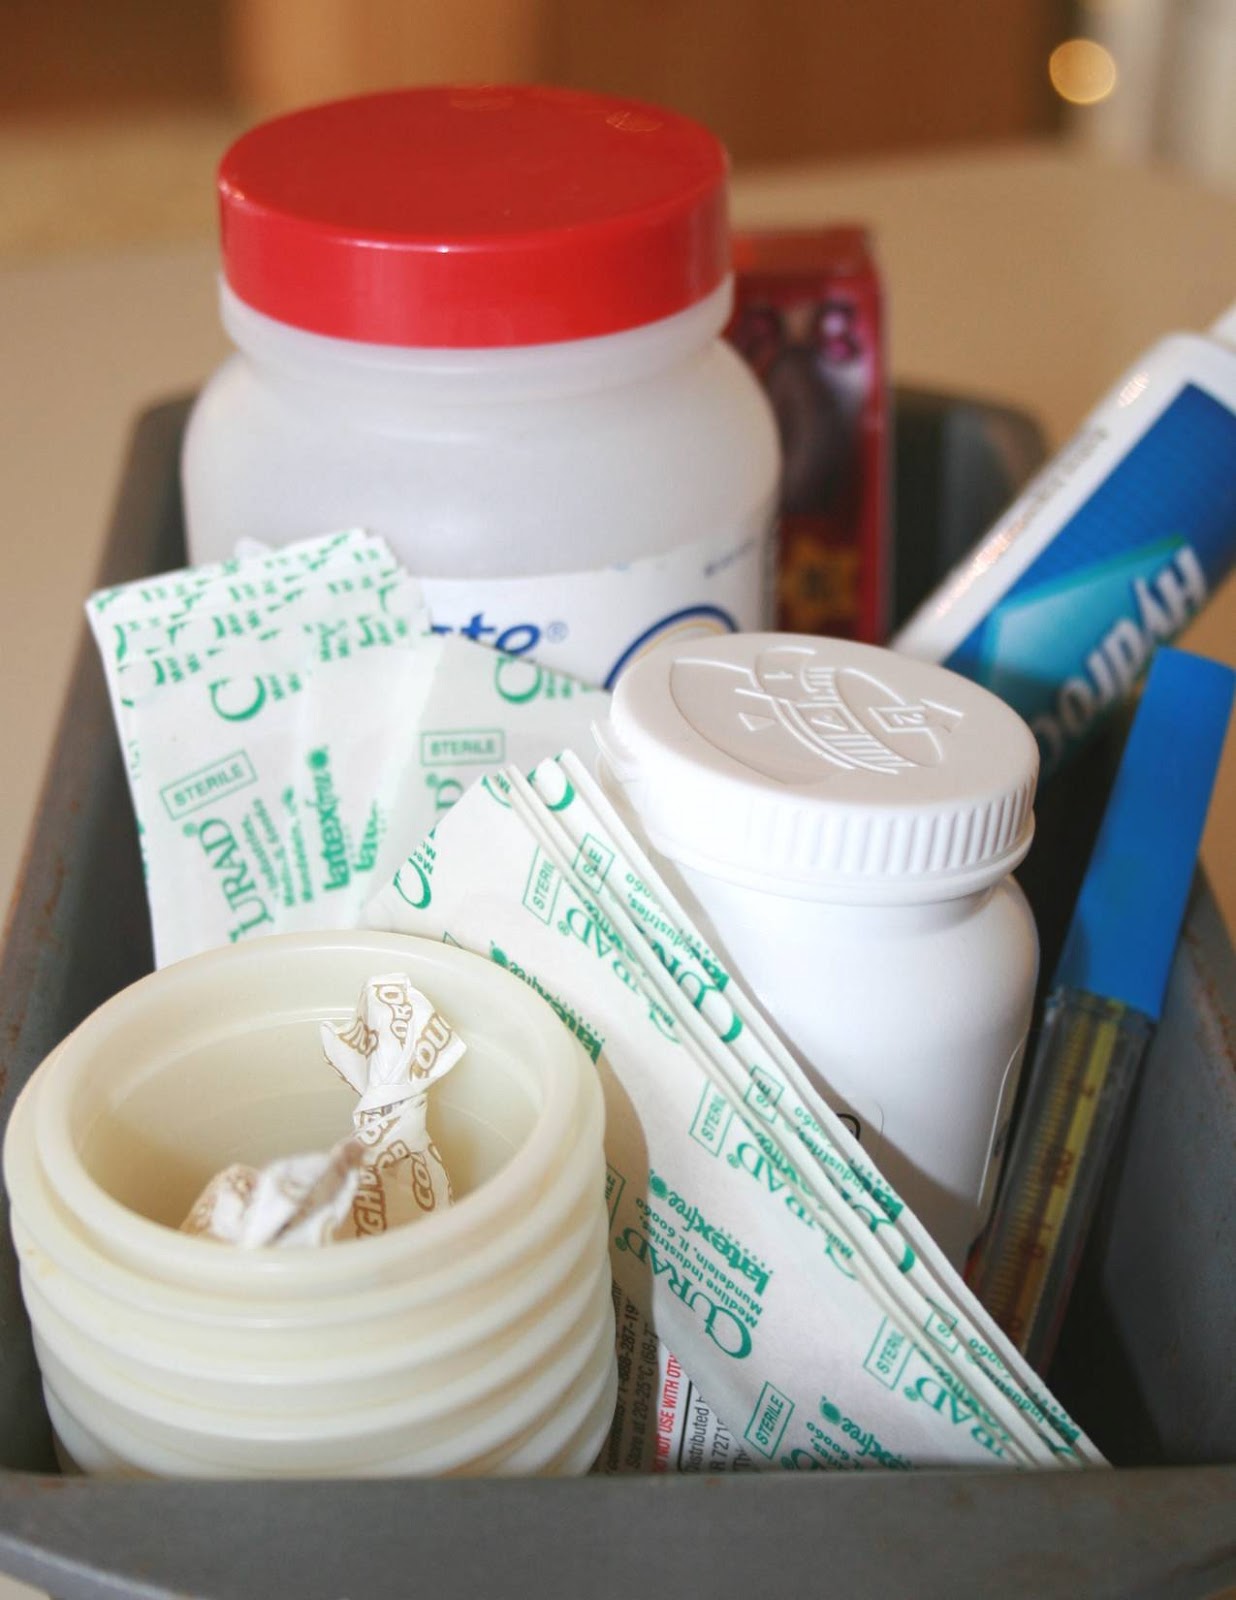
Medicines and first aid organizer.


Our home pharmacy actually requires three loaf pans. That stuff is everywhere!

Use #3:

Seeds organizer.


This time of year, I'm especially glad to have all our seeds in one place!

These ideas are really just ways to use crummy pans to organize stuff. I could see these being helpful in kids' rooms or the garage or the bathroom!

In addition to organizing, I envision little ones using loaf pans as "skates" and scuffling around the house. My kids are too old for this only because their feet are too big. Maturity doesn't apply.

Do you use goofy things to get things done, too? 

Saturday, April 27, 2013

Homemade tortilla chips

Oh my goo'ness, you simply must try these homemade tortilla chips.

They are super easy but also crispy and good!

Tortilla Chips

Ingredients:
Soft-shell flour tortillas
Olive oil
Garlic powder (and any other spices which sound good)
Salt


Directions:
Preheat oven to 400 degrees.
Lightly grease a cookie sheet with olive oil.
Cut the tortillas into four pieces...or eight pieces. Up to you.
Place the cut tortillas on cookie sheet.
Brush with olive oil.
Sprinkle with a bit of garlic powder.
Bake at 400 degrees for 5 to 7 minutes--until they are golden but not too dark.
Salt the chips as they come out of the oven.
Serve with a bowl of salsa.

 
Shared on these neighborly sites:
Mad in Crafts
Flour Me with Love
Tales from Trish
Adventures of a DIY Mom
Growing Home Blog 

Friday, April 26, 2013

Happy Pretzel Day!


Who loves pretzels? I love pretzels!!

Here is how I make them...

Soft Pretzels 

Ingredients:
4 teaspoons yeast
1 teaspoon sugar
1 ¼ cups warm water

In a large mixing bowl, dissolve above ingredients and let sit for about 10 minutes. The mixture should foam a little.

Into the yeast mixture, add the following ingredients:
3 ½ cups flour
½ cup sugar
1 ½ teaspoon salt
1 tablespoon olive oil

On a floured plate or board, knead the dough. Add about one cup more flour as needed during kneading.

Lightly oil a large bowl and roll the dough in it, so that all sides of the dough are lightly covered with oil.

Cover the bowl with plastic wrap or a greased towel and let rise in a warm place for about an hour and a half.

Preheat oven to 425 degrees.

Shape dough into 12 pretzel shapes or about 24 twisty sticks. It seems twisty sticks are faster to shape, easier to handle, and brown more uniformly when baking (but you do what you want).

In a saucepan, dissolve ½ cup of baking soda into 4 cups of hot water. Simmer gently.

Dunk one or two pretzels at a time into the water. Use a slotted spoon or wire basket-type spatula so some of the water drains off. (Stir water mixture often to prevent baking soda from clinging to the pretzels).

Bake pretzels on a greased baking sheet for about 8 minutes or until golden brown.

Immediately brush with melted butter.

Then, enjoy them as is…or
*dip them in a bowl of parmesan cheese; or
*sprinkle a cinnamon/sugar mixture on top; or
*sprinkle course salt on top.

These are so soft and delicious--you’ll want to eat them all at once.

Friday, March 15, 2013

Mom, I got gum on my pants


Yep, gum on his pants. He knelt down on some and really imbedded it within the fabric fibers. 

Thanks for a fresh challenge, son!

Instinctively, I slathered some peanut butter onto the spot and rubbed it in.
Nothing budged. 

Then I remembered something about ice hardening gum, allowing it to be scraped from fabric. I put some cubes on top and waited about 20 minutes.

After scraping with a knife and not much fuss at all, the gum was gone.

Worked like a charm! 

I don't know if the peanut butter helped or if I could have skipped it.

But I do know that a day without gum on your pants is a good day, indeed.
 
Shared on these neighborly sites:
Natural Living Mamma
The Prairie Homestead